Working with Amazon ECR Registry Credentials
Amazon AWS typically uses keys instead of traditional usernames & passwords. These keys consist of an access key ID and a secret access key. While it is possible to use the aws ecr get-login command to create an access token, this will expire after 12 hours so it is not appropriate for use with Anchore Engine, otherwise a user would need to update their registry credentials regularly. So when adding an Amazon ECR registry to Anchore Engine you should pass the aws_access_key_id and aws_secret_access_key.
anchore-cli registry add /
             1234567890.dkr.ecr.us-east-1.amazonaws.com /
             MY_AWS_ACCESS_KEY_ID /
             MY_AWS_SECRET_ACCESS_KEY /
             --registry-type=awsecr
The registry-type parameter instructs Anchore Engine to handle these credentials as AWS credentials rather than traditional usernames and passwords. Currently the Anchore Engine supports two types of registry authentication standard username and password for most Docker V2 registries and Amazon ECR. In this example we specified the registry type on the command line however if this parameter is omitted then the CLI will attempt to guess the registry type from the URL which uses a standard format.
The Anchore Engine will use the AWS access key and secret access keys to generate authentication tokens to access the Amazon ECR registry, the Anchore Engine will manage regeneration of these tokens which typically expire after 12 hours.
In addition to supporting AWS access key credentials Anchore also supports the use of IAM roles for authenticating with Amazon ECR if the Anchore Engine is run on an EC2 instance.
In this case you can configure the Anchore Engine to inherit the IAM role from the EC2 instance hosting the engine.
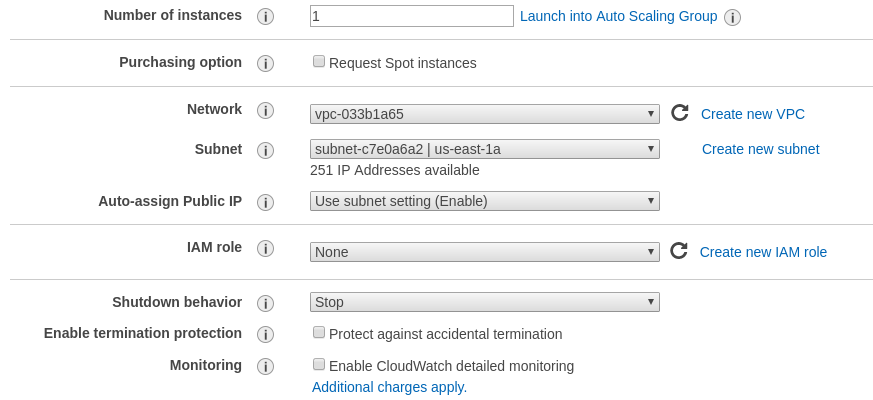
When launching the EC2 instance that will run the Anchore Engine you need to specify a role that includes the AmazonEC2ContainerRegistryReadOnly policy.
While this is best performed using a CloudFormation template, you can manually configure from the launch instance wizard.
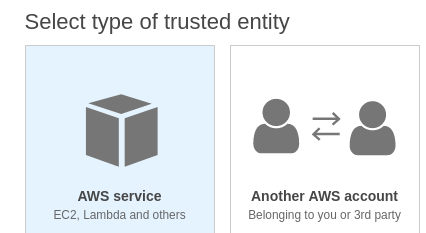
Step 1: Select Create new IAM role.
Step 2: Under type of trusted entity select EC2.
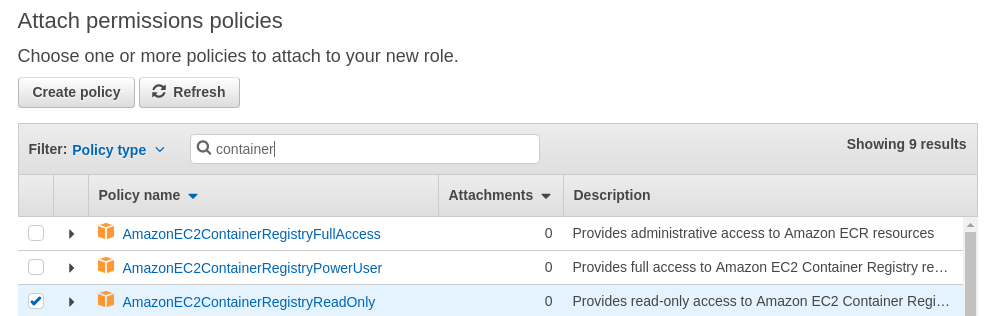
Ensure that the AmazonEC2ContainerRegistryReadOnly policy is selected.
Step 3: Attach Permissions to the Role.
Step 4: Name the role.
Give a name to the role and add this role to the Instance you are launching.
On the running EC2 instance you can manually verify that the instance has inherited the correct role by running the following command:
# curl http://169.254.169.254/latest/meta-data/iam/info
{
 "Code" : "Success",
 "LastUpdated" : "2018-01-1218:45:12Z",
 "InstanceProfileArn" : "arn:aws:iam::123456789012:instance-profile/ECR-ReadOnly",
 "InstanceProfileId" : "ABCDEFGHIJKLMNOP”
}
Step 5: Enable IAM Authentication in the Anchore Engine.
By default the support for inheriting the IAM role is disabled.
To enable IAM based authentication add the following entry to the top of the Anchore Engine config.yaml file:
allow_awsecr_iam_auto: True
Step 6: Add the Registry using the AWSAUTO user.
When IAM support is enabled instead of passing the access key and secret access key use “awsauto” for both username and password. This will instruct the Anchore Engine to inherit the role from the underlying EC2 instance.
anchore-cli registry add /
               1234567890.dkr.ecr.us-east-1.amazonaws.com /
               awsauto /
               awsauto /
               --registry-type=awsecr
Feedback
Was this page helpful?
Glad to hear it! Please tell us how we can improve.
Sorry to hear that. Please tell us how we can improve.